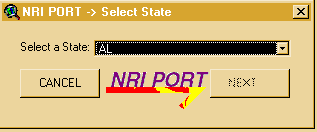
1. Start ArcView. Load the NRI PORT Extension. 2. NRI Port loads and asks you if you want to start. Make sure that the NRI-Port -> CD is loaded in the CDROM drive and when prompted enter the cdrom drive letter like d:. 3. Select a state's data to load:
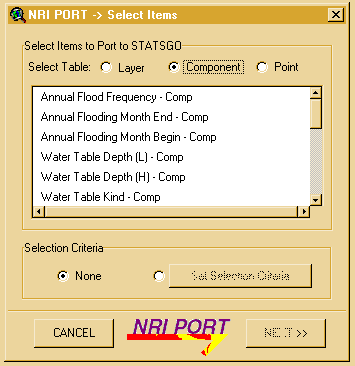
4.Once the state has been selected, the related data is brought into the project. To do this, some data must be moved to the hard disk. A dialog box will ask you to select locations for each file. 5. The data will be copied to the disk, and brought into the project. Then it will be pre-processed so that later analysis is faster. This could take up to several minutes. You will be presented with a dialog indicating progress. 6A. After pre-processing is complete the Items dialog will appear. Select up to five items to summarize to STATSGO. They must be from the same table. The dialog loads with both layer and component items selectable, to view only layer, component or point items click the corresponding radio button. If you wish to use selection criteria in your analysis, then click on the radio button next to 'Set Selection Criteria', then press the button itself. . 6B. If you pressed the 'Set Selectio Criteria' button then you would see the dialog box as seen below. This allows you to select two sets of selection criteria which will limit the data from the item chosen in step 6 to be analyzed. First select a table for the first item. You can choose from layer, component or point. Once you have done this you can select the first item. Select the first item and then select the operator. Different items can have different operators available. (Usually <,>,=<,=>, and = are used). Then select from one of the values. At this point if you are finished and only want one selection criteria, then press 'Enter Selection Equations'. You will see the equation in the box below labeled 'Equation Item 1'. If you want a second item, then choose a selection table from the 'Select Selection Table: Item2' and check the box '2nd Item'. Then choose the relationship between the second item and the first. Next select the item, the operator and the value. Then press 'Enter Selection Equations' If you are now done, then press 'ok'. You may also notice the button 'Selection Options>>'. If you wish to change the way this dialog works and what it displays then press this button. It is discussed in section 6c.
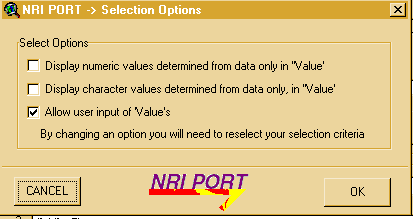
6C. There are several options available for users setting seleciton criteria. The first two options allow you to display actual data in the 'value' pull-down. This means that instead of having to select from a premade set of values, the user can select any value that exists in the actual set of data. This is however very slow because the entire dataset for the item must be read in and placed into the pull-down menu. It is recommended only for patient people. The third option allows the user to enter their own values into the 'value' area. The pull-down menu will be replaced with a text line that allows the user to type in whatever value they wish to. Be warned you could type in a value that would cause an error later when the query is actually executed. When changing any of these options the user will have to reselect all of the selection criteria.
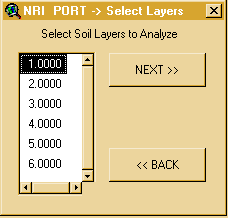
7. If you selected items from the NRI layer table you will presented with a soil layer selection box. Select any combination of soils to summarize. This dialog box is not present when summarizing component items.
8. Next you will need to provide a location on your disk to save the output table. You also will be presented with the names of the items in the final table. It is for display only, as changing them will not change the names in the output table.
9. The porting process now executes. It takes a few seconds to a few minutes depending on the amound of soil layers being summarized and the size of the dataset. 10. When complete you will be presented with a dialog box that asks you if you want to load the corresponding STATSGO coverage and map your summarized NRI data in the STATSGO map units.
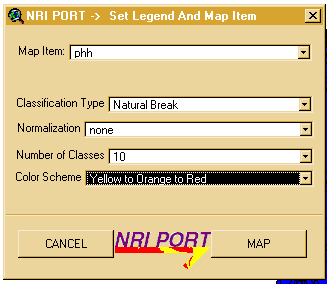
11. If you press NO then you will be done, else the coverage will load from the CD. 12. You will next be asked what ported item you want to map, and what type of classification you wish to use
13. The view will then be created, your data loaded and displayed
14. Congratulations, you've ported data from NRI to STATSGO!
|


